Whether you are creating a new doorway, replacing window lintels, or repairing flashing, helical beaming is a method you may want to consider for its efficiency. This method eliminates tedious and cost-intensive alternatives, including shoring, needling, or removing whole sections of the wall.
HOW MUCH exactly can it save?
On average, replacing a steel lintel and brick runs about $195 per lineal foot (3 courses of brick).
On average, helical masonry beaming runs about $70 per lineal foot.
So, to replace a lintel and brick on a 5-foot window would be $975.
Helical masonry beaming for the same window would be $350. Less than half the cost!
Want to see it in person?

What is helical masonry beaming?
Helical beaming is a strategy to restore the structural integrity to a building where the masonry has failed and has lost some or all of its load-bearing capabilities.

Watch the strength of helical beaming in real life
How does it work?
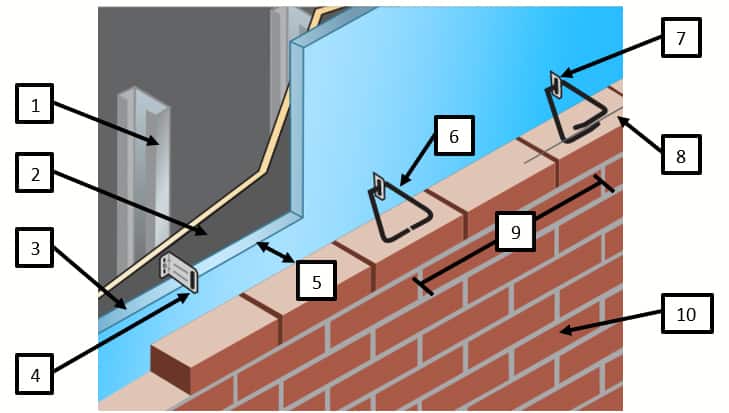
Helical masonry beaming is formed by reinforcing two separate lengths of mortar beds with two Stitch-Tie Bars each, embedded in SureGrout S.
Used in conjunction with SureGrout S, the PROSOCO Stitch-Tie Bar reinforces areas of masonry and produces composite brick beams, allowing the masonry to span over openings. In multi-wythe construction, the helical beaming can be further strengthened if installed on the interior and exterior wythes.
Helical beaming also:
Strengthens walls
Helical beaming reinforces areas of masonry and produces composite brick beams.
Is fully concealed
Repairs are virtually undetectable post-installation. That’s because the beaming is set back into the joint, allowing the repointing to be done with mortar that matches existing joints in the wall.
Saves labor
Helical beaming takes significantly less labor than alternatives such as needling, shoring or removing whole sections of the wall.
Is safer
Helical beaming is also a safer alternative to using shoring because it strengthens the wall before existing bricks are removed.
Where would you use helical beaming?
Sagging lintels


Lintel replacement

Flashing repair

How do you do it? Here’s the step-by-step process
#1: Equip yourself with the specified lengths and distances apart for the helical beams to be installed. (An engineer or architect can help you with this part.)
#2: Measure the wall according to their specs.
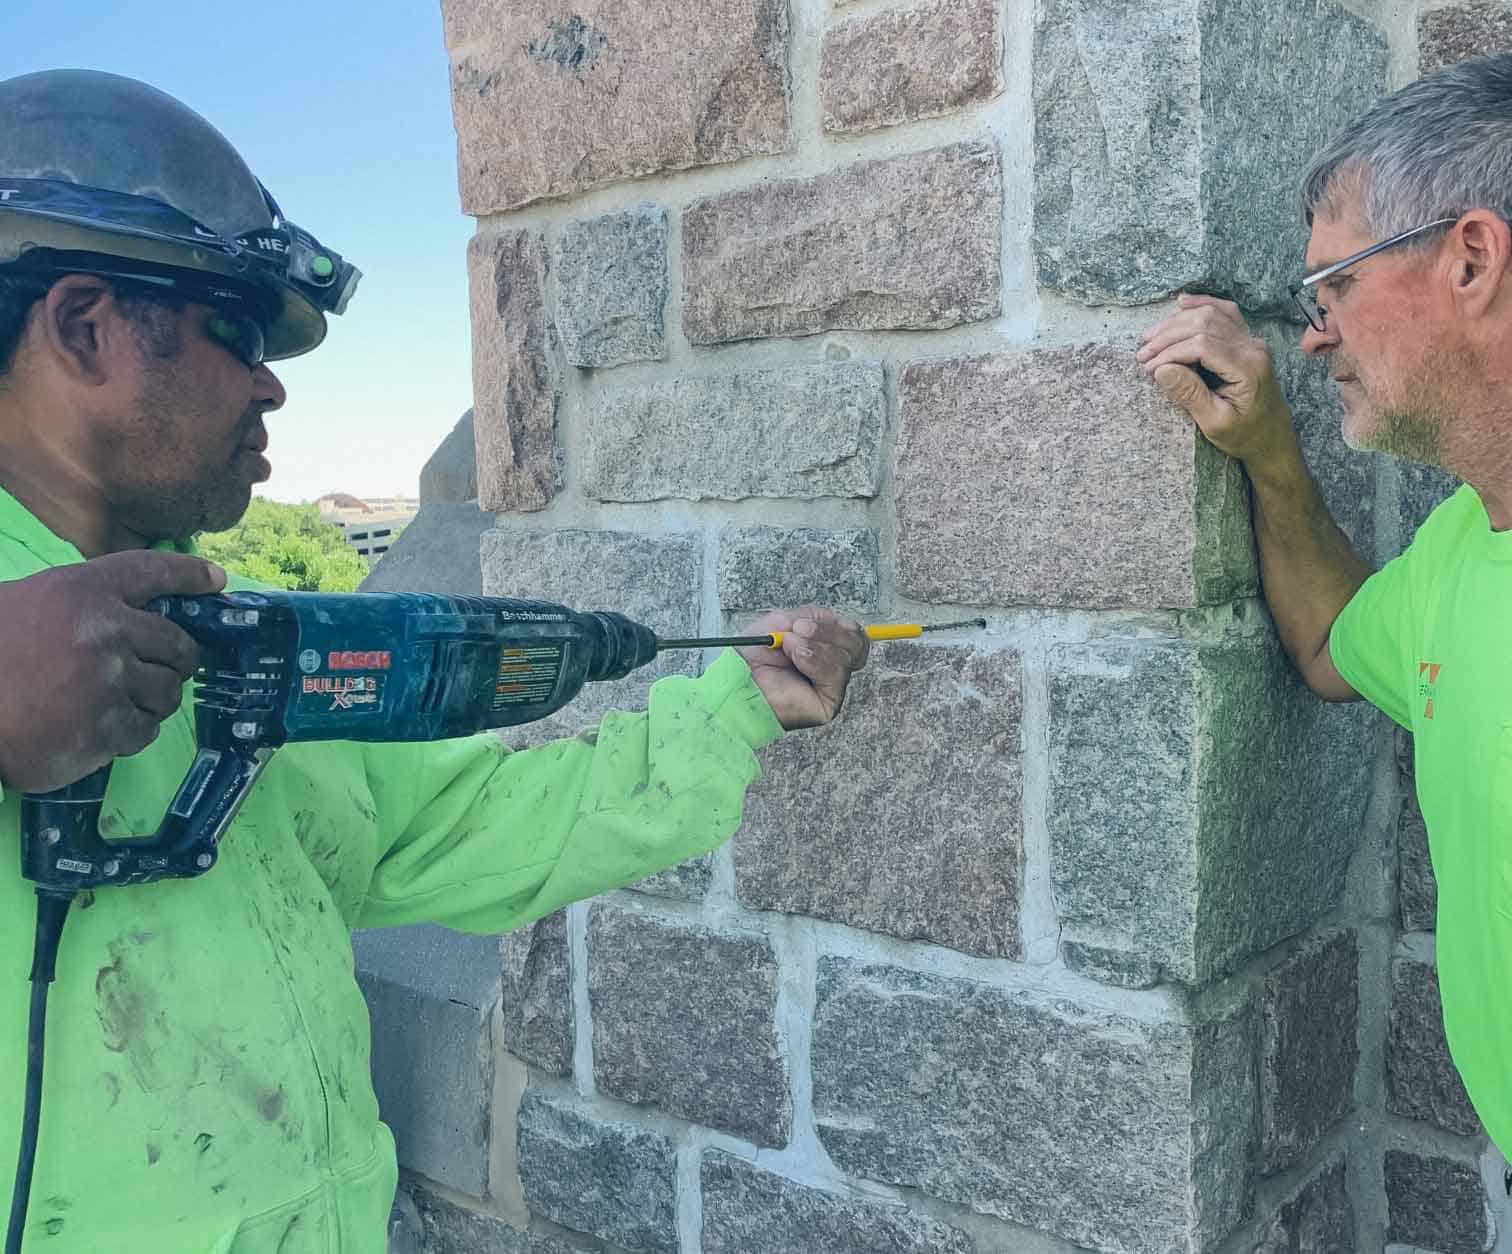
#3: Cut two slots 1.5 inches deep to the desired length and distance apart from one another.
#4: Clean out all the loose mortar and debris from the slots and thoroughly flush with water.

#5: Inject approximately a 3/8-inch bead of SureGrout S to the back of the slot.

#6: Insert a Stitch-Tie Bar into the grout.

#7: Inject a second bead of SureGrout S (also 3/8-inch) over the bar and smooth it out with a flat-pointing tool.

#8: Insert a second Stitch-Tie Bar into the SureGrout S.

#9: Insert a final bead of SureGrout S (also 3/8-inch) over the bar.

#10: Smooth and compact the SureGrout S around the Stitch-Tie Bar using the flat-pointing tool, making sure both bars are fully encapsulated in grout.

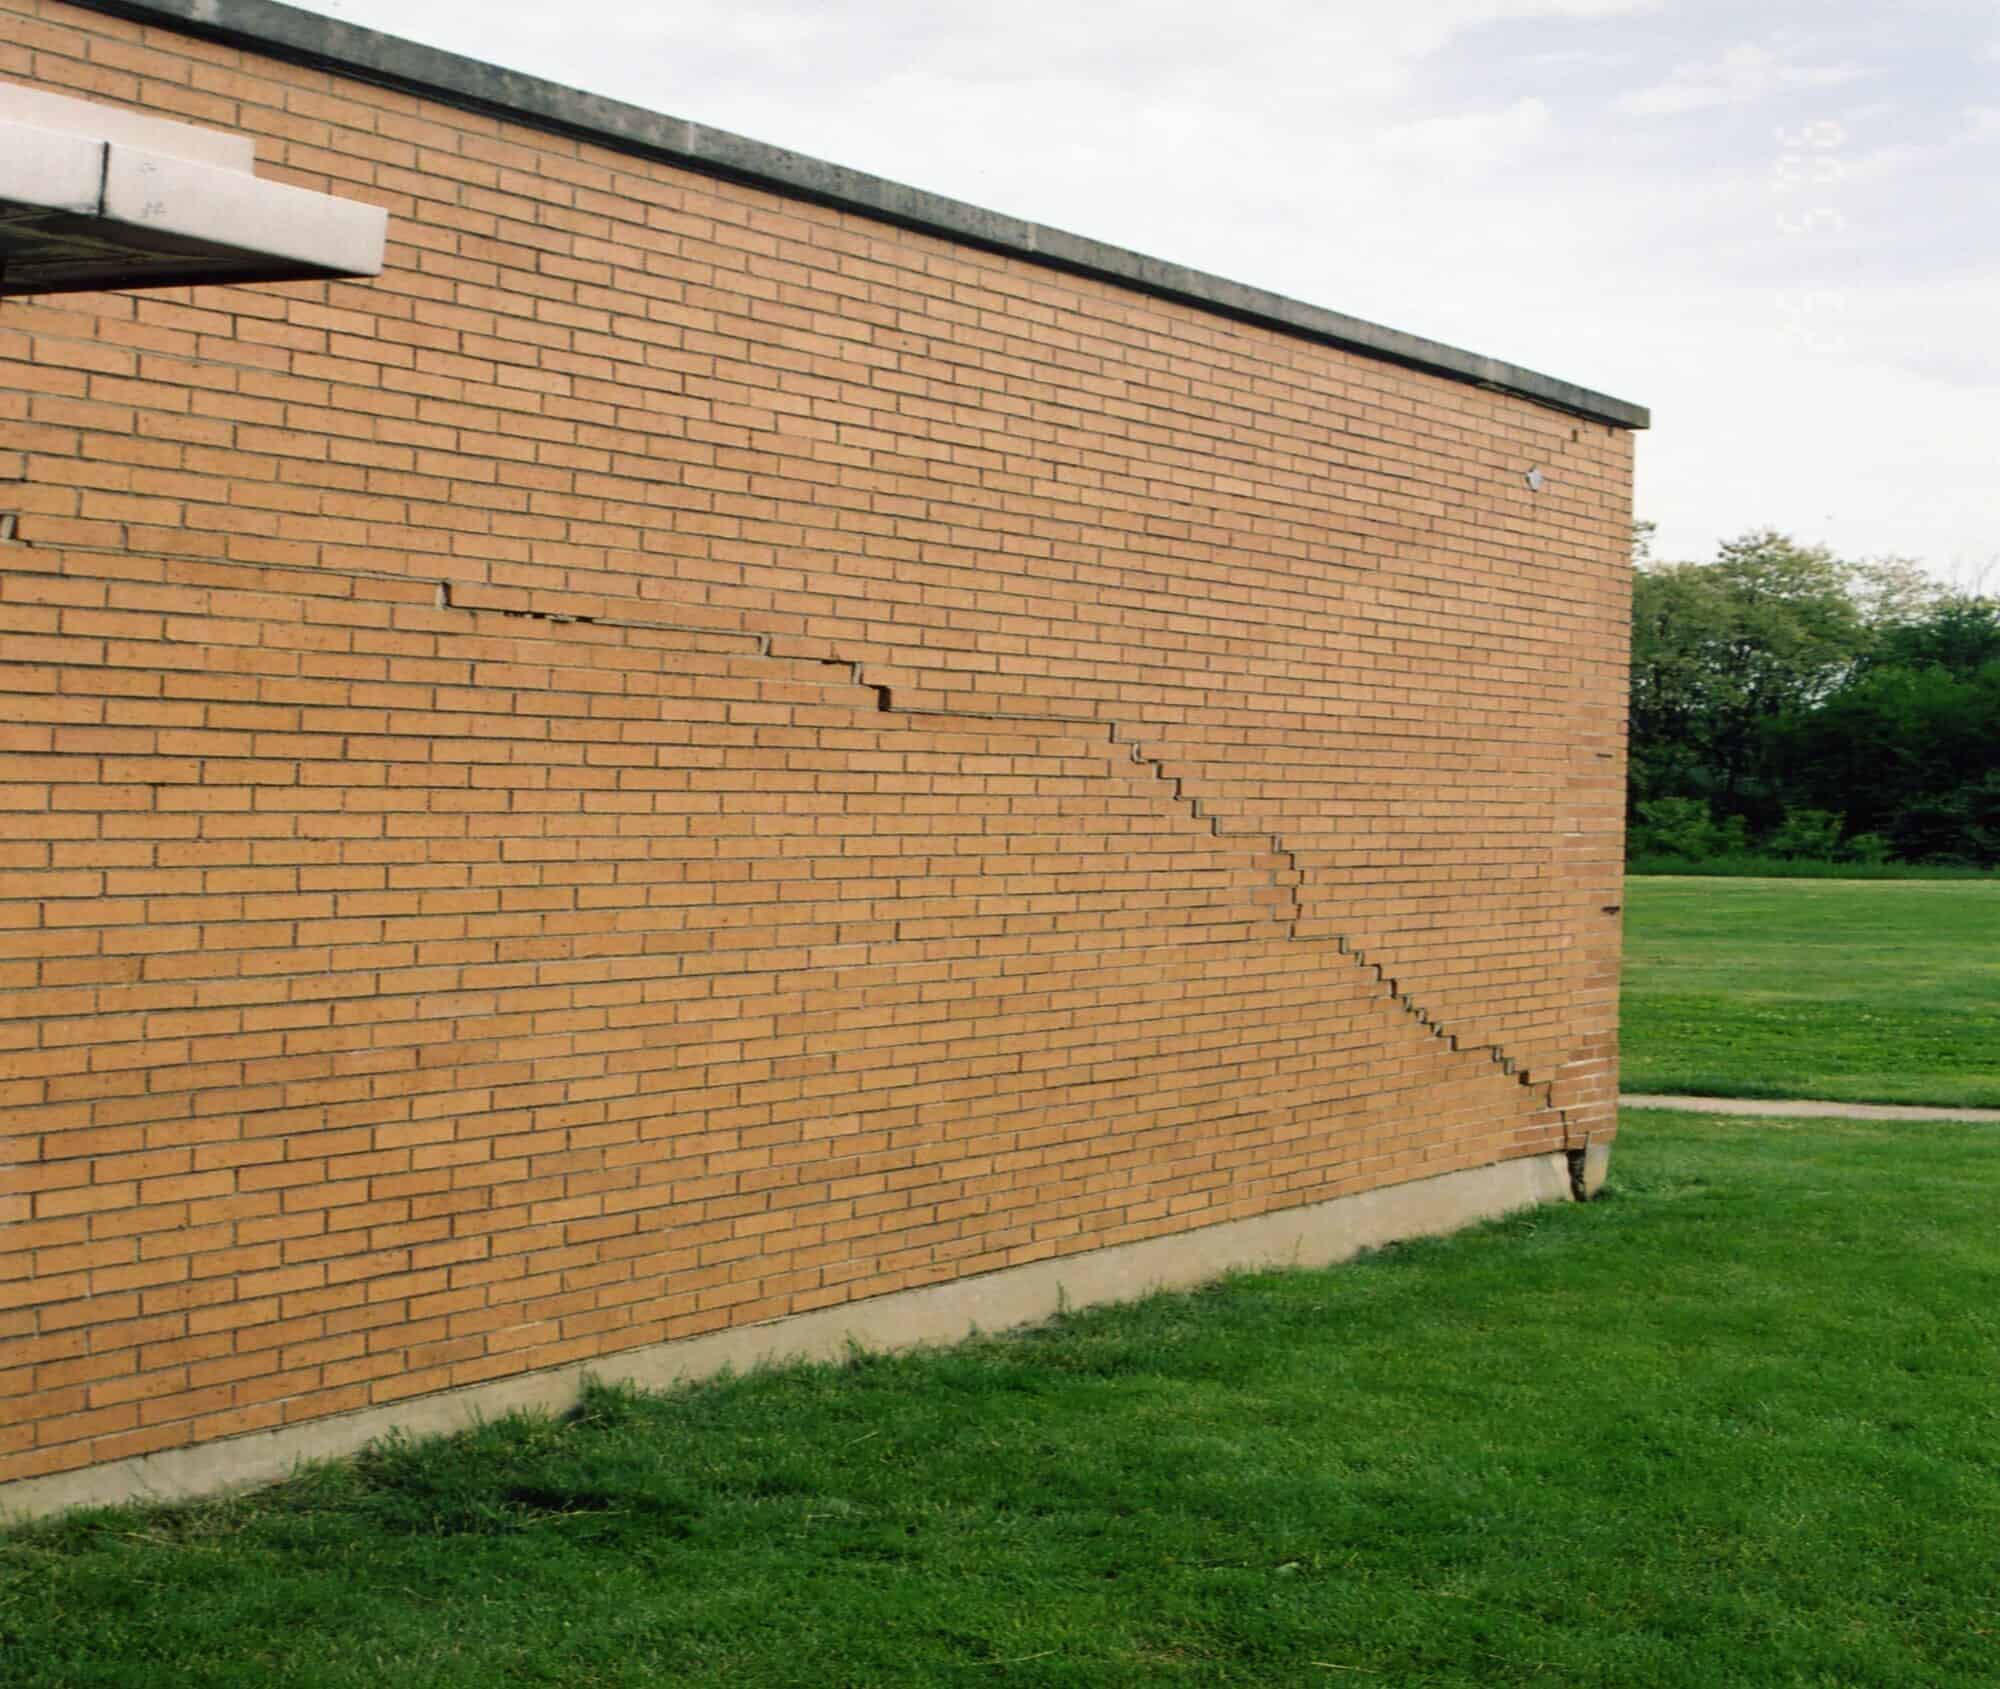
#11: Once the SureGrout S is thumb-print-hard, repoint the slots using an appropriate mortar to match the existing wall. (Mortar-matching is important because you don't want to end up with a wall that looks like this.)

#12: Repoint the joints.

#13: When mortar is cured, wash brick and mortar with a cleaner.