
A window can look sealed from the outside and still be open to water inside the wall. Once trim, cladding, and interior finishes hide the opening, a missed sill corner or broken sealant joint can turn into callbacks, warranty claims, and damage that takes real labor to trace. That is why weatherproofing windows starts with the rough opening, flashing sequence, and air and water barrier connection before the final exterior joint is ever sealed.
Why Window Leaks Start At The Rough Opening
Many window leaks are not caused by the glass or frame alone. They start where the window unit, framing, sheathing, flashing, and wall assembly meet. That joint has to shed bulk water, limit air leakage, and keep incidental moisture from entering the framing.
The rough opening is the first critical control point. If the sill is left exposed, if the jamb corners are missed, or if the head flashing is not integrated with the drainage plane, the finished exterior joint is left covering a weakness instead of supporting a controlled water path.
Professional window weatherproofing has to account for the path water will take when it reaches the opening. Homeowner repair advice usually starts after the leak or draft is already visible, but caulk, adhesive weatherstripping, and window film do not replace the flashing and sealant sequence that should be built into the opening during installation.
For professional crews, weatherproofing windows means protecting the opening before the exterior finish hides the details that control water movement.
The Correct Sequence For Weatherproofing Windows
The correct sequence protects the opening before the installed window is tied into the rest of the wall. For contractors asking how to weatherproof windows during installation, the answer starts with the rough opening and ends with a continuous air and water barrier connection.
A professional sequence should follow this path:
- Prepare the rough opening.
- Treat the sill first.
- Protect the rough-opening corners and sides as the project detail requires.
- Set the window without blocking drainage.
- Integrate the jambs and head with the flashing or counterflashing detail.
- Seal the perimeter into the wall assembly with a compatible air and weather barrier sealant.
- Confirm continuity with the surrounding air and water barrier.
That order keeps each material doing the job it was installed to do. It also keeps the final caulk bead from being asked to do work that should have been handled behind the finished surface.
Start With The Sill
The sill takes the first water load inside the opening, so it needs a protected path down and out before jamb and head flashing direct additional water toward that area. Sill pan flashing or liquid-applied sill protection should be installed before the window is set.
FastFlash fits this rough-opening sequence as a liquid-applied flashing membrane for the sill, jambs, and head. Used this way, FastFlash supports the full rough-opening detail instead of isolating the sill from the rest of the flashing sequence.
Integrate The Jambs And Head In The Right Order
After the sill is protected and the window is set according to the project detail, the jambs and head need to be integrated so water is directed back to the drainage path. The head protection should shed water over the top of the opening and back into the wall’s water-management layer.
The lap direction should always respect gravity. Lower materials need to be in place before upper materials direct water over them. Reversing that order can create a concealed water path, even if every surface appears covered from the outside.
Tape flashing can work when it is lapped correctly, adhered to a properly prepared substrate, and integrated in the right order. Problems usually show up when crews have to wrap corners, bridge uneven surfaces, or stack multiple pieces in a tight sill-to-jamb transition. Liquid-applied flashing gives crews another way to protect those transitions without building the sill and jamb corners out of several small pieces.
Set The Window Without Blocking Drainage
The window must be installed plumb, level, and square in the prepared opening. The installation also has to preserve the designed drainage path.
The sill area should not be sealed in a way that blocks weeps or traps incidental water inside the frame. A window can be tightly sealed on the face and still fail if water has nowhere to go. A properly weather sealed window depends on both protection and drainage, not surface sealing alone.
Shims, fasteners, flanges, and perimeter sealant all have to work with that path. Once the window is set, the next step is to integrate it into the surrounding wall assembly without closing off the route that lets water exit.
Liquid Flashing Vs. Tape Flashing At The Sill And Jambs
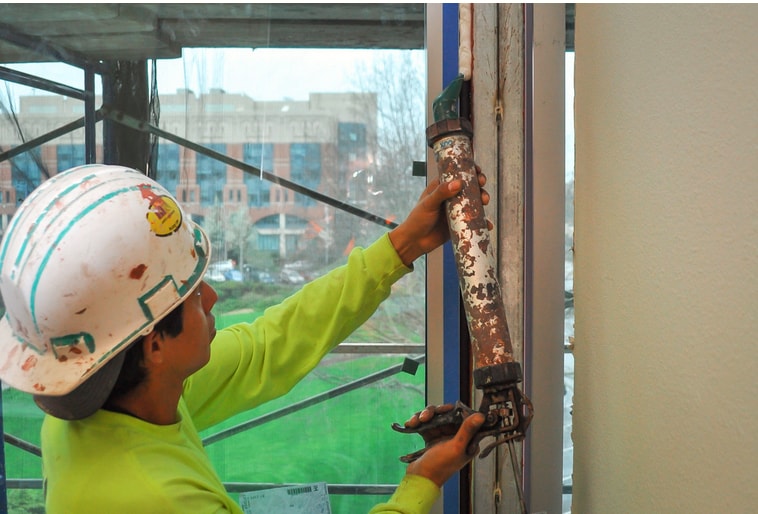
Liquid flashing and tape flashing both protect vulnerable window transitions, but they respond differently to jobsite conditions. The key variables are corners, laps, substrate preparation, pressure, and the consistency of the installation from one opening to the next.
Tape flashing can perform well when the substrate is clean, the laps are correct, and the installer avoids wrinkles, fishmouths, or reverse laps. Problems usually show up when crews have to wrap corners, bridge uneven surfaces, or stack multiple pieces in a tight sill-to-jamb transition.
Liquid-applied flashing is installed as continuous coverage across the rough opening. FastFlash supports liquid-applied detailing at rough openings, including sill treatment, corners, joints, fastener heads, and head or jamb transitions where the project detail calls for it. For weatherproofing windows on projects with repeated openings, a liquid-applied approach can also help crews keep the detailing more consistent.
The flashing method has to fit the opening, the substrate, the installation sequence, and the rest of the air and water barrier system.
Sealing The Window Flange To The Wall Assembly
Once the sill, jambs, and head are protected, the next job is tying the installed window back into the wall assembly. Flashing manages the rough-opening water path, and a compatible air and weather barrier sealant completes the perimeter connection.
After the rough opening is treated and the window is installed, the flange and perimeter need to be connected to the surrounding air and water barrier. This is where sealant selection, backer rod, bead placement, tooling, and bond surface all matter. Flashing, sealant, window materials, and sheathing have to bond properly and tolerate movement after the opening is covered.
At this stage, weatherproofing windows depends on continuity between the flashing layer, the window frame, and the surrounding wall assembly.
Use AirDam To Complete The Perimeter Seal
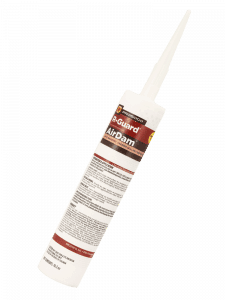
AirDam fits this stage of the sequence as an air and weather barrier sealant for window and door assemblies. In PROSOCO’s system, the rough opening is treated first, then the installed window receives an air-tight window seal with AirDam using backer rod, proper bead placement, and tooling to bond the sealant to the window and the FastFlash-covered rough opening.
Installers see that detail at the joint, and builders see the result when the opening is less likely to become a weak point in the enclosure. Air movement at the perimeter can carry moisture into the assembly, so a properly installed seal helps tie the window into the larger air and water management system instead of leaving the gap around the frame exposed.
Weatherproofing Windows And Doors As One Connected System
Windows and doors interrupt the same air and water barrier. They should be detailed with the same discipline across the project.
A building can have strong field membrane coverage and still leak at openings if each crew handles transitions differently. Window openings, door openings, storefront penetrations, and other breaks in the wall need consistent sequencing and compatible products. That consistency is the difference between isolated sealing work and a continuous enclosure strategy.
PROSOCO’s guidance on weatherproofing windows and doors supports that connected approach. The same project logic applies across openings: protect the rough opening, manage drainage, seal the perimeter, and tie the assembly back into the air and water barrier.
Project managers also need a clear inspection point before openings are covered. If doors and windows are assigned to different crews without a shared detail, the finished building may have mixed flashing methods, incompatible sealants, or uneven quality control. Catching those differences before trim and cladding go on is easier than tracing a leak after the enclosure is closed.
Common Installation Mistakes That Cause Callbacks
Many callbacks start as small installation misses that become expensive after the wall is closed. The exterior can look clean, but water and air will still find the unfinished transition.
Common mistakes include:
- Setting the window before the rough opening is fully protected.
- Treating the jambs before the sill is flashed.
- Reversing flashing laps at the head or jambs.
- Leaving pinholes, voids, or missed corners in the flashing layer.
- Blocking weeps or closing off sill drainage.
- Using sealants that are not compatible with the substrate or flashing material.
- Skipping backer rod where joint geometry requires it.
- Failing to tool the sealant into full contact with both bond surfaces.
- Relying on exterior caulk to cover a broken drainage path.
- Treating doors and windows as separate details instead of connected envelope penetrations.
Each mistake changes the way water or air moves through the opening. A missed sill corner can send water into framing. A reversed lap can direct water behind the flashing. An untooled bead can leave a gap along the perimeter. In weatherproofing windows, small discontinuities matter because openings are where several enclosure layers come together.
The best way to weatherproof windows is to inspect the sequence before the work is hidden. Crews should verify sill protection, jamb and head integration, flange treatment, drainage, and perimeter sealant before trim and cladding make the assembly harder to review.
Build Better Opening Protection With PROSOCO R-Guard Products
PROSOCO R-Guard products help contractors protect window and door openings with consistent air and water barrier detailing. FastFlash supports rough-opening flashing at vulnerable transitions, and AirDam helps crews complete the perimeter seal after the window is installed. Contact us today for more information.