By Jake Boyer
 Not all truths are self-evident. Sometimes they’re easy to forget or clouded with misunderstanding. The good news is these truths of final cleandown are not hard to implement on your next project to ensure successfully cleaned and beautiful new brick.
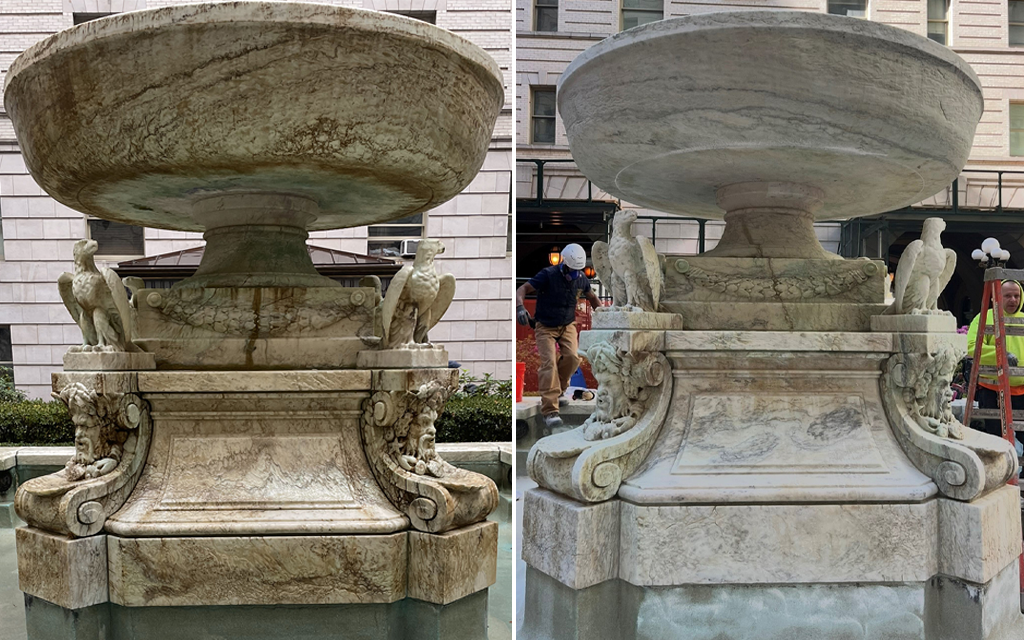
#1: Final cleandown is the cheapest part of laying brick and it provides the biggest impact.
Considering final cleandown is the least expensive scope of work per square foot and the step with the biggest impact on masonry’s final appearance, I’m surprised it’s the step that’s most commonly overlooked, relegated to the cheapest guy on the team, or subbed out to others who may not have the same level of care as the person who just built the wall. Sometimes, final cleandown is skipped entirely in the overall project completion.
You could have the most beautifully laid masonry wall, and if you clean it wrong or use the wrong product, all your beautiful workmanship could be overlooked. Final cleandown should be done by a highly skilled person who understands the chemistry of what they’re doing and why it makes sense.

#2: Not all brick is created equal.
Brick is not brick is not brick. There are hundreds of different colors, finishes, firing methods, and levels of vitrification on the face.
What is vitrification? It’s the high-temperature firing process that melts clay and gives brick that hard ceramic shell on the outside, as well as certain properties of strength, absorption and durability.
Given so many variables in brick, it’s extra-important to know what you’re working with. Just because you had brick on your last job and a certain product worked great, doesn’t mean it will work the same way on your next brick job.
Ask yourself: Is the mortar colored? Is it a different color of brick? Is it from a different manufacturer? Is the brick the same finish? Same absorption rate? Are there adjacent elements on this job that weren’t on the last one such as landscaping, metal railings, etc.?
No two jobs are identical. For this reason, it’s essential to complete a test panel on each new project. What I tell people is rules 1 through 10 in cleaning masonry are all the same: Test. Always test. Even when laid up with the exact same producer’s brick, it can still vary from batch to batch in firing temperatures, porosity, and initial rate of absorption (IRA).

#3: Best practices are your best friend.
This isn’t rocket science! Following basic jobsite practices is a super-simple way to ensure an effectively cleaned masonry job. As a refresher, that includes:
- Storing masonry off the ground and making sure it’s covered.
- As you build, capping the walls at the end of each day (certainly prior to any rain events so your brick isn’t just sucking up additional water!)
- Spreading straw or hay at the base of the wall to prevent backsplashes (especially in a red clay region.)
These basic preventative measures don’t take that much time but are so commonly neglected. Forgetting best practices leads to issue after issue, and time-suck after time-suck in trying to find resolution. Like a paint job and many other projects, the final results are heavily determined by the preparation.
What could go wrong if these best practices aren’t followed?
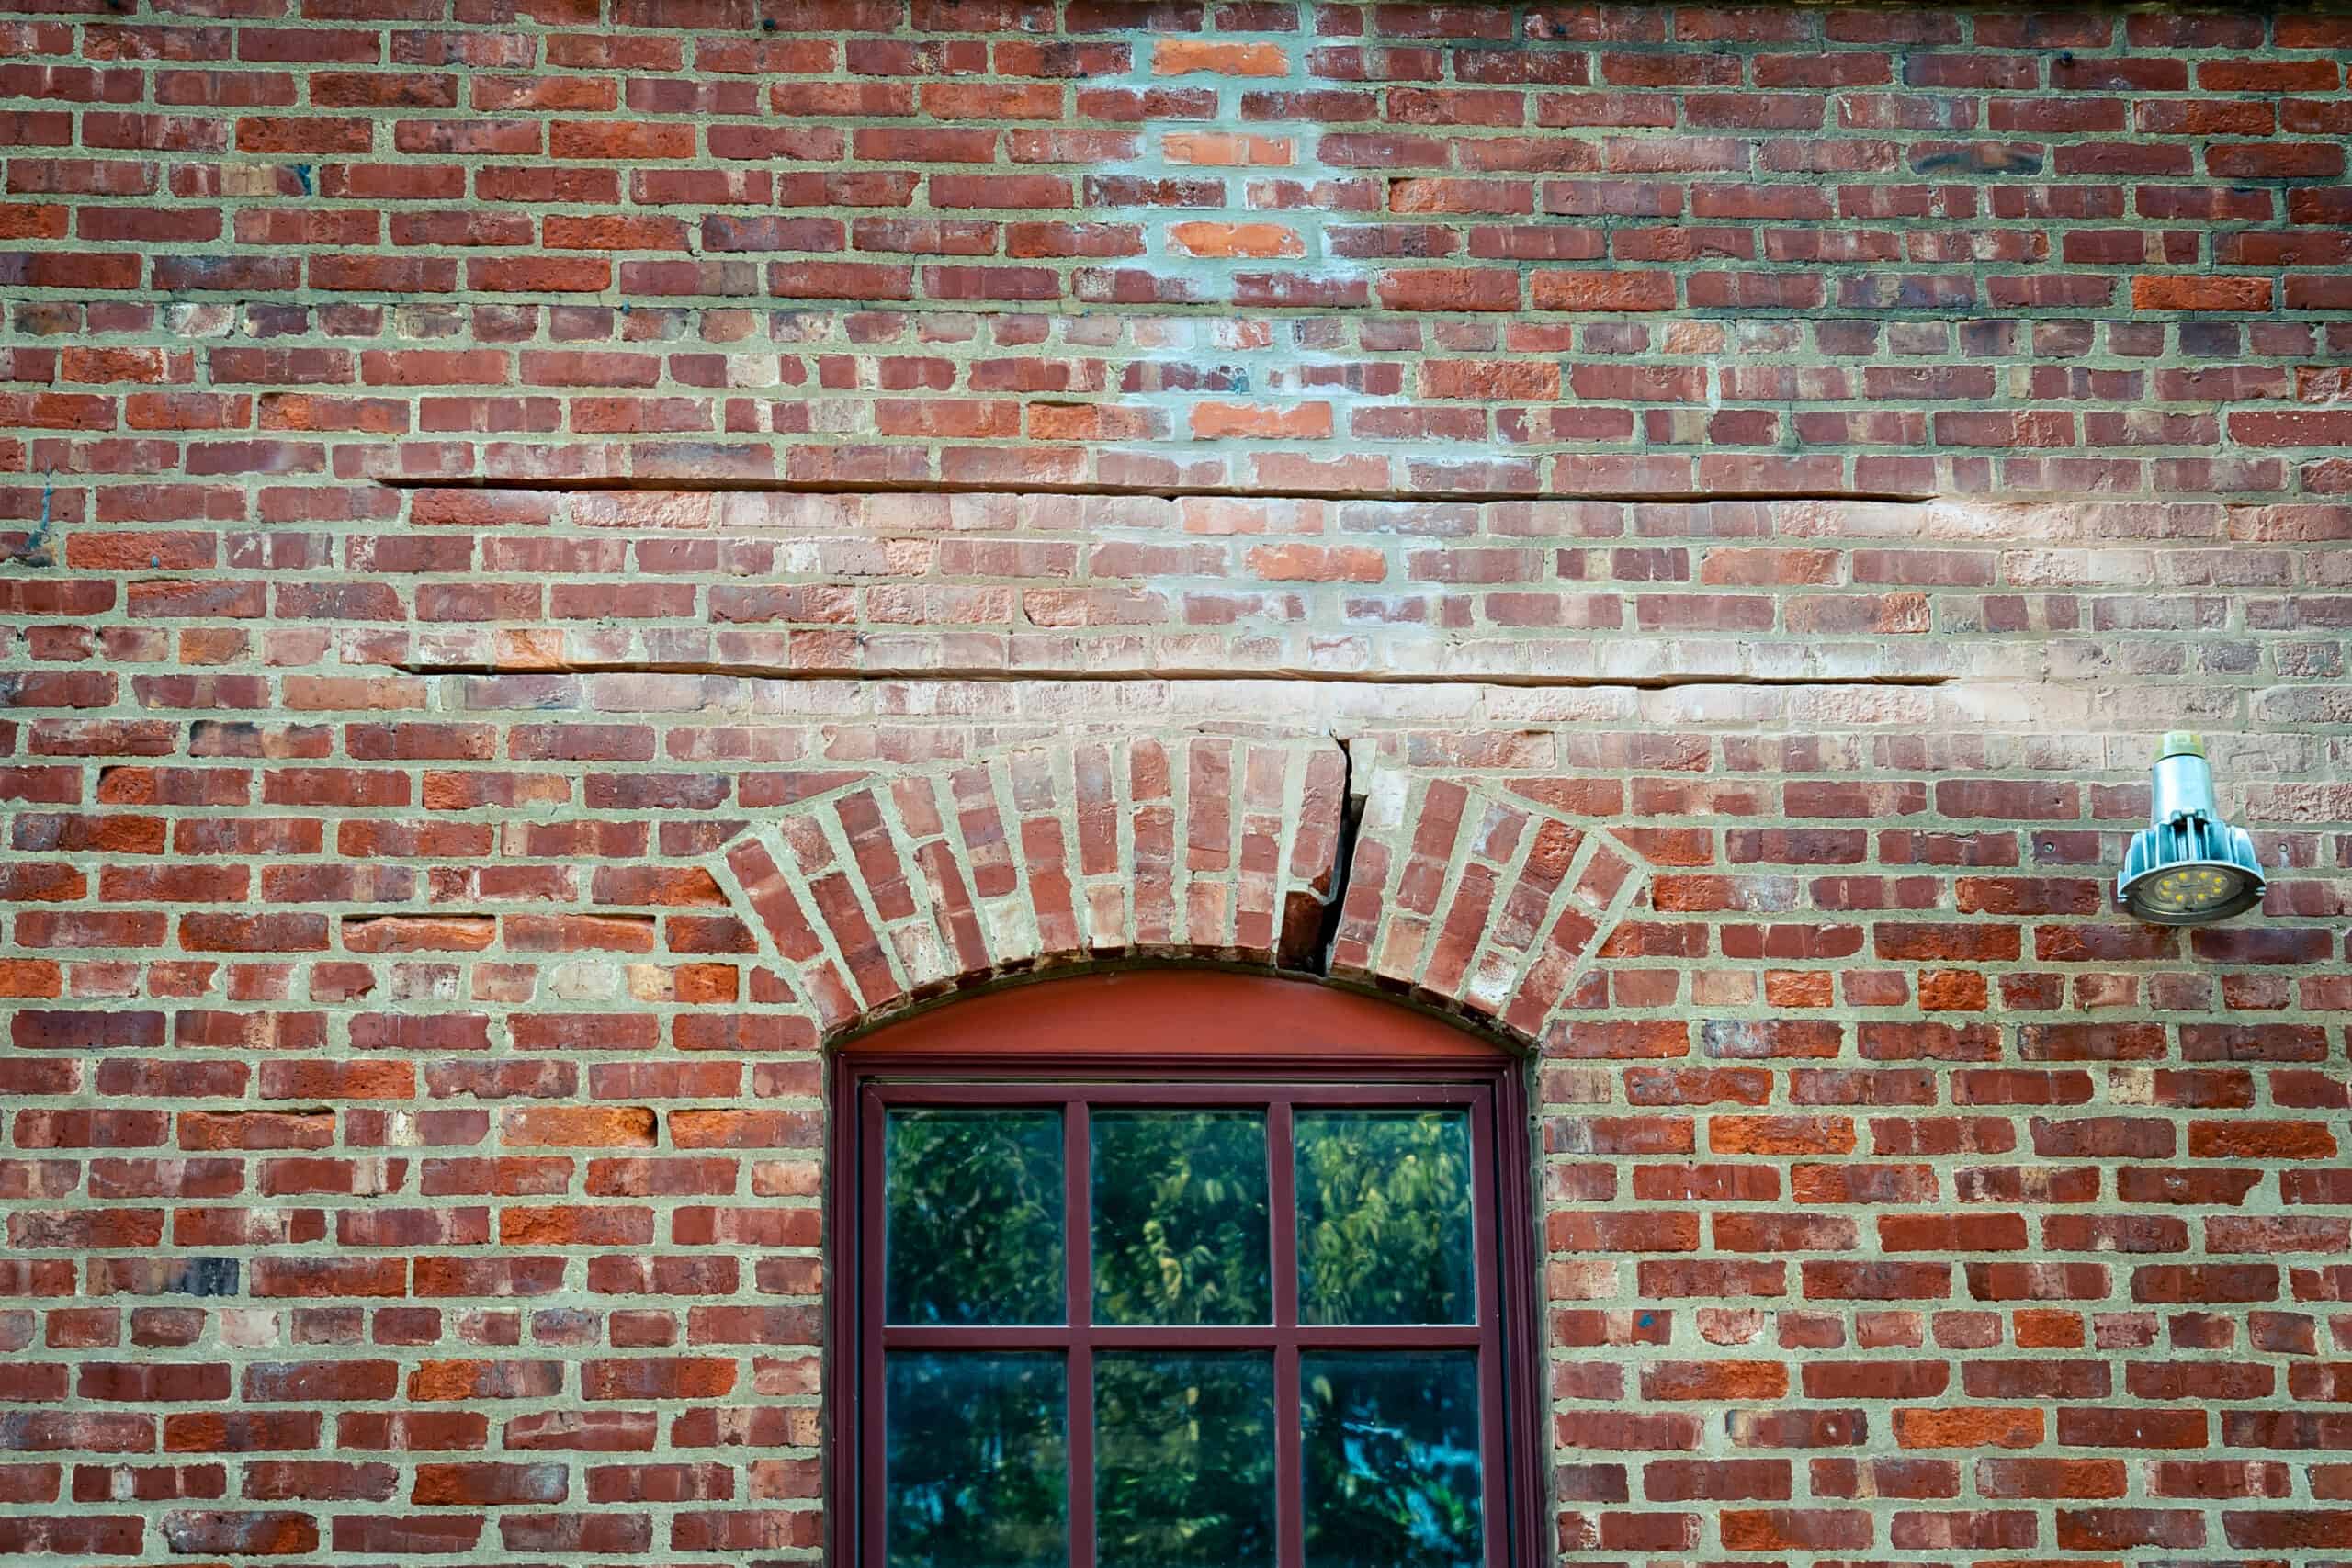
Inconsistent levels of moisture in your brick, for starters. When brick sits on the ground it absorbs water from it (or from a rain event if the brick is left uncovered). Water leads to stains – primarily, in these circumstances, efflorescence bloom. When you lay up brick that is saturated with water, you’re depriving it from the ability to absorb moisture from the mortar, a process that allows adequate curing and an effective bond at the joint interface.
Forgot to cap the walls at the end of the day and it rained overnight? Say hello to more stains on brand new brick.
Rainwater will enter the pore structure of brick, meaning the added moisture in your fresh mortar will solubilize free lime more readily than it would with a cured mortar, and bring it to the face of the brick in the form of efflorescence, lime run, manganese, or vanadium.
Forgot to spread some hay or straw at the base of the wall? If you’re in a region with red clay, be prepared to see splatters all over your freshly laid brick in the morning. The longer it sits, the harder it is to remove. Red clay stains aren’t wildly difficult to remove, but it’s one more step in the process you could have avoided had you just bought a bale of hay for a few bucks and sprinkled it around the base of the wall.
Forgetting best practices leads to issue after issue, and time-suck after time-suck in trying to find resolution.
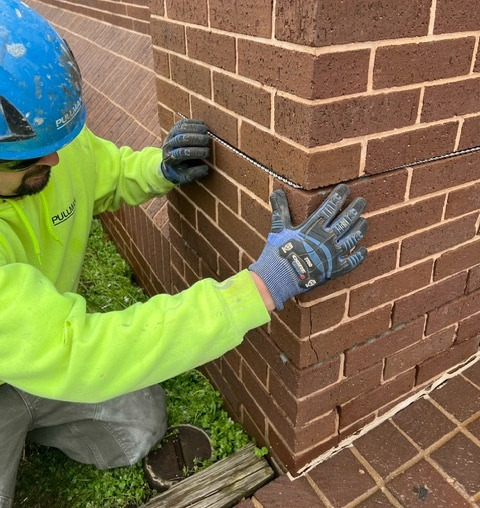
#4: A properly tooled joint is not just for looks.
A common question I get is how to remove mortar smears without dissolving the mortar joints. The way you can remove one thing without damaging or dissolving the other is by properly tooling your joints.
The reason we tool joints is not just for aesthetics. The process of tooling also puts a smooth, finished cap on the joint that allows the mortar to hold in moisture and cure to its full structural strength. Once the mortar has cured, the rinse of the final cleandown won’t go into the mortar joints – it will attack the loosely bound globs and chunks of mortar on the wall that are only partially hydrated at best.

#5: Bottoms up.
Once your wall is up and ready to clean, the way you clean can make a big difference. Can you clean from top to bottom and be successful? Yes, absolutely. However, I recommend the opposite for best results, and the reasons are widely misunderstood.
Why bottom to top? Here are my top 2 reasons:
When you clean in the opposite direction (top to bottom), the problem areas that need extra attention aren’t as visible because they get wet from the rundown of the cleaning happening above, and any chemical residue is allowed to run down the wall and absorb into it when it hits a dry spot.
Efflorescence, for example, disappears when it’s wet, then rears its ugly head again as soon as the substrate dries out if it’s not fully solubilized and rinsed all the way off the wall. The same goes for a lot of other stains that you can see clear as day on a dry substrate. On a wet substrate, it blends in and mirrors the surrounding areas. If I’m working bottom up, everything above me is always dry so I can see those specific spots that I need to hit with more cleaning solution and scrubbing. Whereas, if I’m working top-down, a lot of those spots are masked because of the moisture running down the wall. Then you might be in for a surprise the next day when those spots suddenly stick out like a sore thumb.
The second reason I recommend cleaning bottom to top is because it ensures that everything below the working space is saturated at all times. Masonry is like a sponge – it can only absorb so much. If you’ve prewet the wall thoroughly down at the base and continuously as you climb, and then you’ve worked up course by course over time, thoroughly rinsing as you go, anything you’re working on above that space will have been not only prewetted but also rinsed, and all that residual water running down over the surface is going to continue to keep the bricks below saturated. Then, when the partially dissolved mortar, efflorescence, and lime are rinsing down the wall, the masonry is already saturated and can’t absorb any more.
On the other hand, if I’m working top down, the brick below my working area may be wet, but not thoroughly hydrated. So, as I dissolve those components and stains, they run down the wall and can get sucked back into the non-hydrated, thirsty wall in a process called redeposition. The stains are redeposited on the face of the brick.
Can you effectively clean from top to bottom? Yes, provided you take the necessary precautions.
The bottom line is this: If you’re going to work from top to bottom, it’s extremely important to ensure that you’ve got the areas below your cleaning zone thoroughly and continuously wetted to ensure stains and residual chemicals won’t absorb back into the wall, making them much more difficult to remove when you get down to that area.
![]()