
Every concrete surface moves. Temperature swings, sub-base shifts, and years of loading cause micro-stress that eventually opens visible cracks. Leave them alone long enough, and moisture moves through the gaps, breaking bond lines under coatings and sealers. Professional concrete crack repair stops that process early—restoring surface integrity before it spreads through the slab.
Why Concrete Cracks and Why It Matters
Concrete expands and contracts with temperature and moisture. When movement exceeds the tensile limit of the paste, hairline fractures appear. In driveways or warehouse floors, these often start along control joints or where curing conditions were uneven.
Small openings seem cosmetic but can quickly become pathways for water, de-icing salts, and oils. Once those contaminants enter the matrix, they react with aggregate and reinforcing steel, widening the crack and staining the surface. Early concrete crack repair limits that intrusion and keeps coatings or densifiers from debonding later.
Identify the Type of Crack
Before any repair, determine what caused the crack and how deep it runs.
- Hairline cracks (very narrow, typically ≤ 1⁄16 in.) usually do not indicate structural movement but should be assessed for cause and depth.
- Settlement cracks show offset edges or widening across slabs; they signal movement in the base or sub-grade.
- Joint cracks occur where saw cuts or cold joints opened wider than intended.
For most flatwork, treat shrinkage and joint cracks with surface fillers or sealants. Wide or uneven cracks suggest slab movement and may need stabilization before patching. Vertical wall cracks require different injection methods and should be evaluated structurally.

Prepare the Surface
Successful concrete crack repair depends on adhesion, and adhesion depends on preparation. Any dust, laitance, or residue kills adhesion before it starts.
- Clean the crack using compressed air or vacuum after mechanical scraping.
- Widen narrow openings slightly with a grinder or chisel to expose sound concrete along the sides.
- Dry the area thoroughly—most repair materials will not bond to damp surfaces unless rated for moisture tolerance.
- Inspect for embedded debris or friable edges and remove them before applying filler.
The goal is a clean, open bond line that allows repair materials to penetrate and cure against solid substrates. On most jobs, skipping this step shortens the life of any concrete crack repair by years.
Choose the Right Repair Material
Not all fillers behave the same once cured. Each filler cures differently and performs according to crack width and floor use.
Cementitious and Polymer-Modified Fillers
For surface leveling and pinhole repair before grinding or polishing, use a high-bond filler that cures into the slab rather than sitting on top.
- Prosoco’s Grind-N-Fill is formulated for this purpose.
- Applied by pump-up sprayer or auto-scrubber, it penetrates micro-cracks and hardens into a continuous surface ready for mechanical polishing.
- It mixes with grinding dust to create a more uniform, easier-to-polish surface and seals pores that would otherwise absorb the densifier solution unevenly.
Epoxy and Polyurethane Systems
When cracks exceed 1⁄8-inch or carry load, select an epoxy injection or semi-rigid polyurethane system meeting ASTM C881 bonding-agent standards. Epoxies provide structural strength; semi-rigids remain flexible for thermal cycling in warehouse floors.
Rapid-Setting Mortars
For high-traffic or time-sensitive areas, rapid-setting patch materials conforming to ASTM C928 achieve working strength within hours. They’re useful near loading docks or production aisles where downtime must stay minimal.
Tools and Materials by Crack Width
The right tools make or break a repair. A concrete crack repair process for hairline fractures might use nothing more than a wire brush, shop vacuum, and squeegee, while larger gaps require specific preparation steps.
- Hairline to 1⁄16-inch: Use a crack-chaser blade or grinder to open edges. Apply thin liquid filler with a squeegee or auto-scrubber.
- ≥ 1⁄4-inch: Insert backer rod to control filler depth; size rod 25–50% larger than the joint, depending on rod type. This prevents wasted material and allows the filler to flex under movement.
- Over 1⁄4-inch voids: Use a pointing trowel, caulking gun, and cartridge-based epoxy or polyurethane. Level flush and check after curing for any low spots.
Keep separate sets of tools for clean and contaminated surfaces. Residue from oil or sealer work will compromise adhesion and shorten repair life.
Apply and Finish the Repair
After selecting the filler, follow a controlled sequence.
- Mix components according to manufacturer ratios—over-activating accelerators can cause brittleness.
- Place the material with firm pressure to eliminate voids and ensure full contact with crack walls.
- Strike-off or level flush with surrounding concrete before cure.
- Give it the full cure window. Grind too soon and you’ll trap resin—leaving a cloudy finish that never levels right.
Once hardened, grind or sand the patch lightly to match texture. A uniform surface ensures sealers wet evenly and maintain consistent gloss or permeability. Skimping on drying time undermines concrete crack repair by allowing moisture to migrate under the patch.
Seal and Prevent Future Cracks
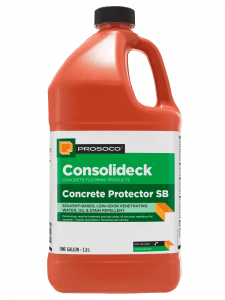 A filled crack still needs protection from moisture and chemicals. Apply PROSOCO Consolideck Concrete Protector SB — a penetrating, breathable treatment designed for horizontal concrete floors. It repels liquid water and chloride intrusion while allowing internal moisture to escape, preventing blistering or delamination under coatings.
- Routine inspections should follow seasonal temperature changes.
- Re-seal every few years or after aggressive cleaning to maintain surface integrity.
- Proper joint spacing, drainage, and load management reduce stress and keep future cracks from propagating.
Under typical conditions, treated floors are ready for foot traffic once dry to the touch, with water- and stain-repellency developing after roughly 24 hours and continuing to improve for 7 days.
Inspect and Maintain for Long-Term Durability
Even the best concrete crack repair needs periodic attention. Schedule inspections every six to twelve months, especially after freeze-thaw cycles or heavy forklift traffic. Look for:
- New hairline openings forming near previous repairs.
- Staining that signals moisture intrusion.
- Surface whitening, which can indicate efflorescence.
- Reapply filler or sealer where needed before the slab degrades further.
A consistent maintenance plan turns concrete crack repair into long-term protection, not a one-time fix.
Extend Your Concrete’s Service Life with PROSOCO Concrete Repair and Sealing Products
PROSOCO develops materials that restore and protect concrete surfaces in demanding environments. Each filler, densifier, and sealer is field-tested for adhesion, cure, and moisture control to keep floors performing under load and exposure. Extend the service life of your concrete with professional-grade repair and protection from PROSOCO. Contact us today for more information.