
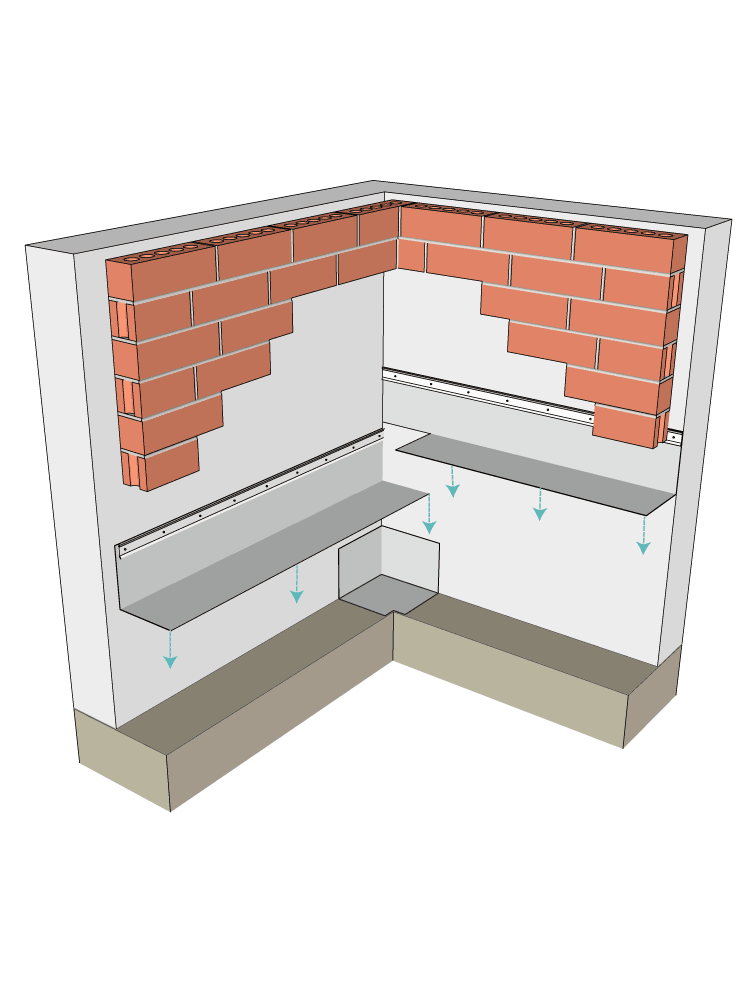
R-Guard Installation Detail
Window Head Detail ThruWall Flashing & Termination Bar
ThruWall Flashing

Download this detail

1.
Place drip edge metal on lentil above the head of the window. Secure the drip edge to the lentil by wet-setting the edge metal into wet FastFlash placed on the horizontal ledge of the lentil.
2.
Recess SS ThruWall or Thru-Wall flashing on the horizontal drip edge metal 1/2 inch, then carry up the wall 8 inches above to the supporting wall with SS ThruWall or Thru-Wall flashing over a chamfered cut edge of the insulation as indicated below. Extend flashing 6 inches beyond each side of the masonry opening. Wet-set SS ThruWall or Thru-Wall flashing into FastFlash to adhere to the angle and vertical wall interface.
3.
To transition from the air- and water-resistive barrier to the SS ThruWall flashing, apply a bead of FastFlash immediately above the top edge of the termination bar. Use a dry joint knife or trowel to spread the wet product to create a seamless counter-flashing membrane which directs bulk water from the air- and water-resistive barrier to the SS ThruWall or Thru-Wall flashing. Apply additional FastFlash as needed to create an opaque, monolithic flashing membrane free of voids or pinholes.
4.
Place end dam corners at either side of the lentil and seal edges with FastFlash creating a pan above the window head. Insert weep vent at the head joints to facilitate evacuation of moisture in the cavity.


Ted Barnekoff
Product Support - Air & Water Barriers
READY TO HELP
At Prosoco, real humans answer the phone, so why not give them a call?